Depending on what you model in SketchUp or where you are in the 3D modeling process, you’re likely to favor some tools over others. In SketchUp, you can decide which toolbars you want to see. Toolbars are organized differently on Microsoft Windows and Mac OS X. In this section, you discover the options for customizing SketchUp toolbars for your current operating system.
Windows
On Microsoft Windows, you can change which toolbars appear in your SketchUp workspace by selecting View > Toolbars. In the Toolbars dialog box that appears, select the checkbox next to any toolbar you want to see, or deselect the checkbox for any toolbar you don’t want to see. Then click the Close button.
The following table introduces each toolbar and when the toolbar is most useful.
| Toolbar Name | Toolbar | This Toolbar Is Handy When… |
|---|---|---|
| Advanced Camera Tools |  | Modeling movie sets with the ACT tools |
| Camera |  | Looking at your model from many different angles |
Classifier  |  | Modeling with BIM (Building Information Modeling) and IFC data. |
| Construction |  | Modeling precisely |
| Drawing |  | Drawing a 3D model |
| Dynamic Components |  | Developing dynamic components |
| Edit |  | Editing an existing model |
| Getting Started | 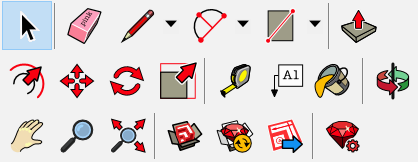 | Learning to draw in SketchUp |
| Large Tool Set | Displays the Principal, Drawing, Edit, Construction, and Camera toolbars as well as the Section tool in a long narrow toolbar that docks to the left side of the drawing area. | You need an all-purpose toolbar. |
| Tags |  | Organizing groups or components into layers to control visibility, especially after you have experience working with SketchUp’s Tags feature. |
| Location |  | Accessing maps for images, geolocation data, or terrain |
| Principal |  | You need only a basic tool set and want to maximize the drawing area |
| Sandbox |  | Modeling TINs to create terrain or rounded objects |
| Section |  | Adding section planes that create a view inside your model |
| Shadows |  | Adjusting shadow settings or studying shadows at different times of day |
| Solid Tools |  | Modeling complex shapes with the Solid tools |
| Standard |  | Accessing basic file and clipboard commands from a toolbar would be helpful |
| Styles |  | Switching among SketchUp’s face styles frequently, such as when tracing a floor plan in X-Ray view and then checking your geometry in Shaded with Textures view |
| Views |  | Switching among the standard views, such as Top, Front, Iso, and so on |
| Warehouse |  | Sharing models via the 3D Warehouse or adding extensions via the Extension Warehouse |
Setting preferences to customize your workspace
In SketchUp, preferences options enable you to customize your workspace.
To access these preferences, select Window > Preferences (Microsoft Windows) or SketchUp > Preferences (Mac OS X) from the menu bar. In the sidebar on the left, select the preference panel that you need.
The following table outlines how you can customize the workspace and what preference panel enables you to make a change.
Tip: SketchUp extensions, also called plug-ins, enable you to add specialized tools and features to SketchUp. To customize your workspace with extensions or manage you extensions preferences, log into the Extension Warehouse and use the extensions management features. See the Extension Warehouse section of the Help Center for details.
| To Do This | Open this Preference Panel | Good to Know |
|---|---|---|
| Set the default image editor. | Applications | Determines what image editor opens when you want to edit a texture in an external editor. Click Choose and select an application on your operating system. |
| Display crosshairs on your cursor that correspond to axes colors. | Drawing | Select the Display Crosshairs checkbox in the Miscellaneous area. |
| Activate the Paint Bucket tool after you click a material swatch (Mac OS X only). | Drawing | This checkbox is enabled by default. Deselect Auto-activate Paint Tool to disable it. |
| Toggle the Push/Pull tool’s pre-pick feature. | Drawing | Pre-pick is enabled by default so that you can select a face, orbit, and push/pull the face even when the selected face doesn’t appear in the current view. Select Disable Pre-pick on Push/Pull Tool to disable the feature. |
| Display a component bounding box and its edges in different colors. | Compatibility | This feature is disabled by default. Select the Bounding Box Only checkbox, and a component’s edges appear in a different color from the component box when you select the component. |
| Change the size of the toolbar buttons. | Workspace | The large buttons are enabled by default because they’re easier to see and use. For smaller buttons and a larger drawing area, deselect the Use Large Tool Buttons checkbox. |
| Select whether windows cascade and the default window size (Mac OS X only). | Workspace | On a Mac, windows cascade by default. Deselect Cascade Main Windows to turn off cascading. Click the Save Current Window Size button to make the size of the active window your default window size in SketchUp. |
| See the toolbars and panel trays after closing them. | Workspace | Click the Reset Workspace button and your toolbars and panels instantly reappear in the most recent docked position. |