In this article, we will explore different methods to select every other or every nth row in Excel, whether you are working with small datasets or larger ones.
If you’ve ever found yourself frustrated with the time-consuming task of manually selecting specific rows in Excel worksheets, you’re not alone. In the fast-paced world of business, efficiency is key, and every minute counts. That’s why we’re here to introduce you to a set of professional techniques for selecting every other or every nth row with ease and precision.
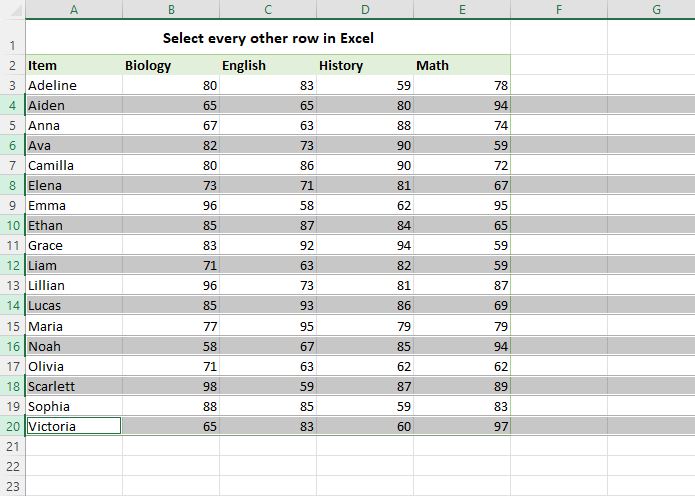
Select every other or every nth row using Ctrl key
If you are working with a small dataset, manually selecting every other or every nth row can be done using the Ctrl key. Here’s how:
1. Click on the first row you want to select, and then press and hold the Ctrl key on your keyboard.
2. While holding the Ctrl key, click on every other row or on every nth row.
3. Release the Ctrl key, and you will have selected the desired rows.
This method works well for small tables, where the number of rows is manageable. However, for larger datasets, this manual selection can be time-consuming and prone to errors. In such cases, it is more efficient to use other methods discussed below.
Selecting every other row with formula and filter
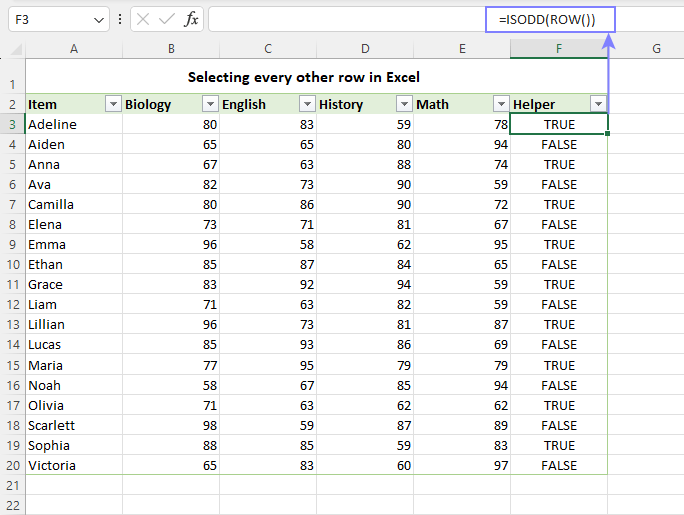
When working with larger worksheets, the task of selecting alternate rows becomes much simpler by utilizing a helper column and the Filter functionality. Follow the steps below to achieve this:
1. In an empty column next to your dataset, enter one of these formulas:=ISODD(ROW())=ISEVEN(ROW())
These formulas utilize the ROW function to retrieve the number of each row, while the ISODD and ISEVEN functions determine if the row number is odd or even, respectively. This will help you identify the rows you want to select.
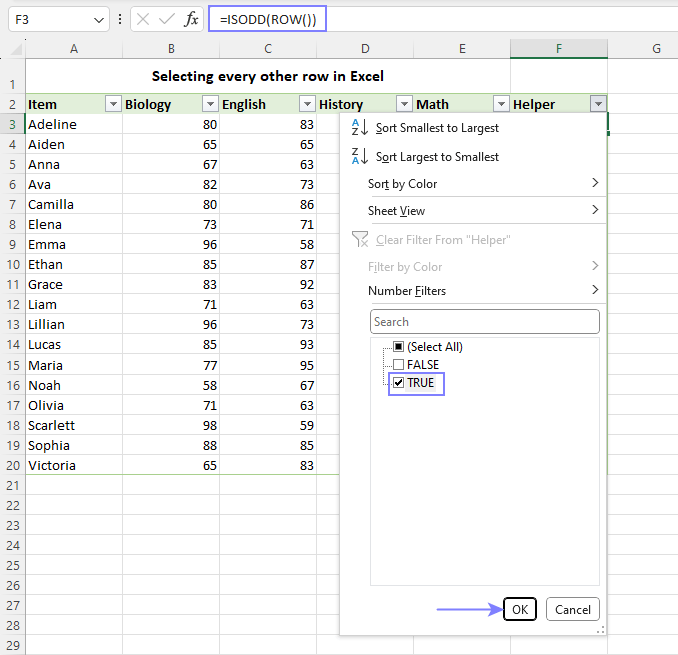
2. Add filters to the column headers. For this, select any cell within your dataset and click the Filter button on the Data tab, or use the Ctrl + Shift + L shortcut.
3. In the helper column, click on the filter arrow and uncheck either TRUE or FALSE depending on whether you want to select odd or even rows.
4. Click OK, and Excel will filter the data, displaying only the rows you have selected.
5. Select the filtered rows using your mouse or the Shift key.
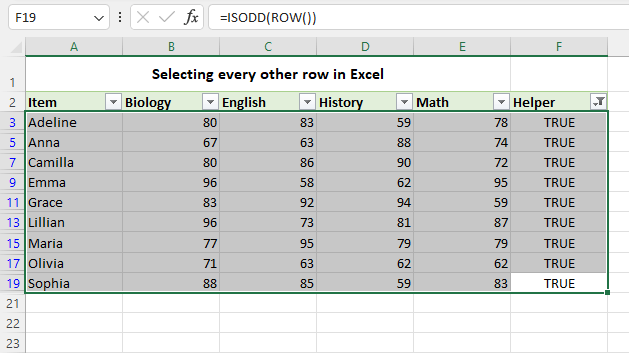
When selecting filtered data, it’s important to note that Excel only selects the cells that are visible. Therefore, if you highlight the visible cells, only the alternate rows will be highlighted once the filter is removed. Similarly, if you copy the visible rows to another location, only every other row will be copied.
Selecting every nth row with formula and filter
To select every nth row in Excel, you can modify the previous method slightly, by using the MOD formula for the helper column:
MOD(ROW()-m, n)
Where:
m is the row number of the first cell in your dataset minus 1
n is the Nth row you want to select
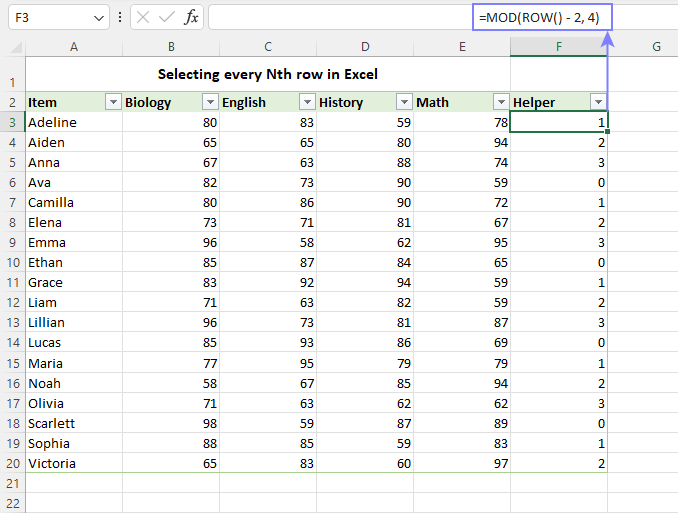
For instance, if your data begins in row 3 and you want to select every 4th row, then m would be 2 (row 3 minus 1) and n would be 4:
=MOD(ROW() - 2, 4)
With the formula established, follow these steps to filter every Nth row in Excel:
1. Determine the m and n values for the MOD formula and enter it in the Helper column.
2. Add Excel’s auto filters to your set of data.
3. In the helper column, click on the filter arrow and uncheck the box next to Select All.
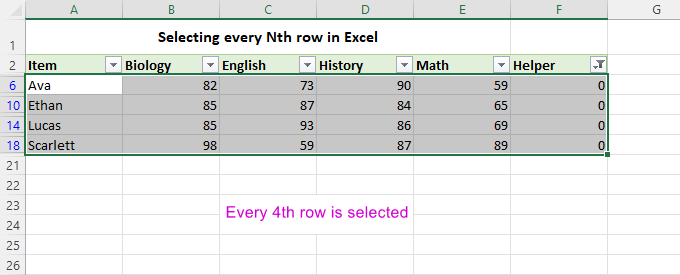
4. Check the box next to “0” to show only “0” values in the helper column. These values correspond to every Nth row, according to your chosen value of n. Click OK to apply the filter.
5. Select all of the visible rows that appear after filtering.
6. Remove the filter and delete the helper column if it’s no longer needed.
In conclusion, selecting every other row or every Nth row in Excel can be made easier with various techniques. For small tables, using the Ctrl key to manually select rows can suffice. However,