Overview
Installing Enscape for the first time should be simple and straightforward. However, for best results, we recommend that, before installing Enscape, you should make sure that your CAD software is not open and that you also have the user rights to install software on your Windows operating system. You can then simply open and run the Enscape.exe installer.
Installer Location
P:\07 SOFTWARE\29 Enscape\Windows Enscape
Run the Enscape-4.0.2.11.exe (or if already installed, right-click and run as administrator – see below)
Open the Installer
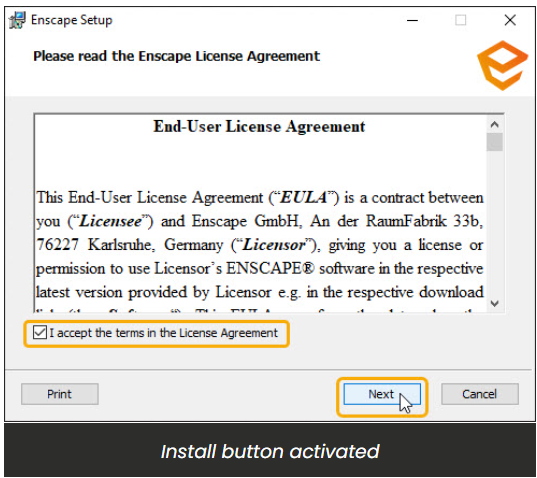
When installing Enscape for the first time, the initial screen will request that you agree to the End-User License Agreement (EULA). The ‘I accept the terms in the License Agreement’ checkbox needs to be checked, allowing the Install button to become available. You can also print the EULA via the Print button, or you can choose to press the Cancel button if you do not want to proceed with the installation.

You will then be asked to select the language that you would like Enscape to be installed under. Currently, the options are Chinese (Simplified), German, English (United States), Spanish, French, Italian, Japanese, Dutch, Polish and Portuguese (Brazil) (with more languages to come). In this window, you will also be able to click the Advanced button, to choose whether to install Enscape for all users of the machine or just the current user.
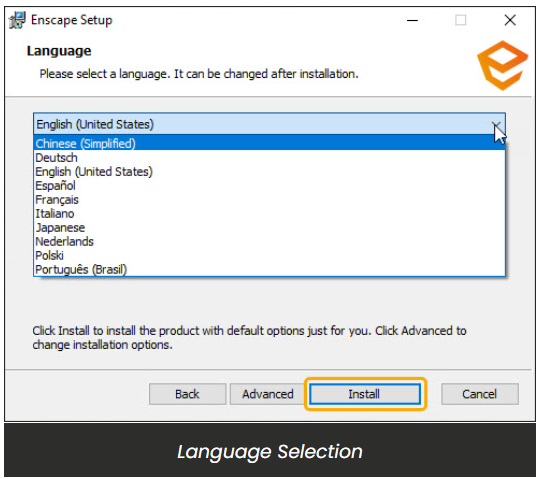
NOTE: the language can be changed after installation if required. The option to do this is found in the Enscape General Settings window under the Preferences options.
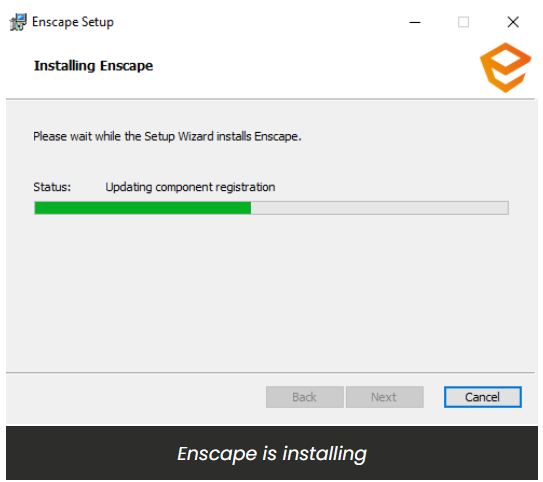
The installer will then run and you should see this in the installer window as shown in the following screenshot.
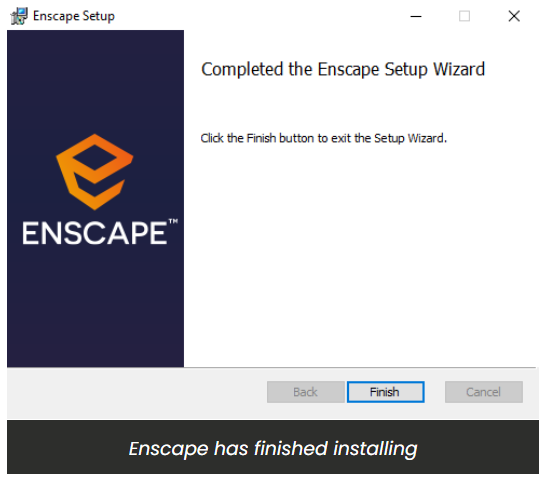
Once it has finished, you will then see the following screen indicating Enscape has finished installing.
You should then be able to open your CAD where you should see Enscape as a top level menu option, or as a Toolbar. If you can not see Enscape in your CAD, then you may need to enable it in the CAD’s workspace.
To understand how to do that, please click here.