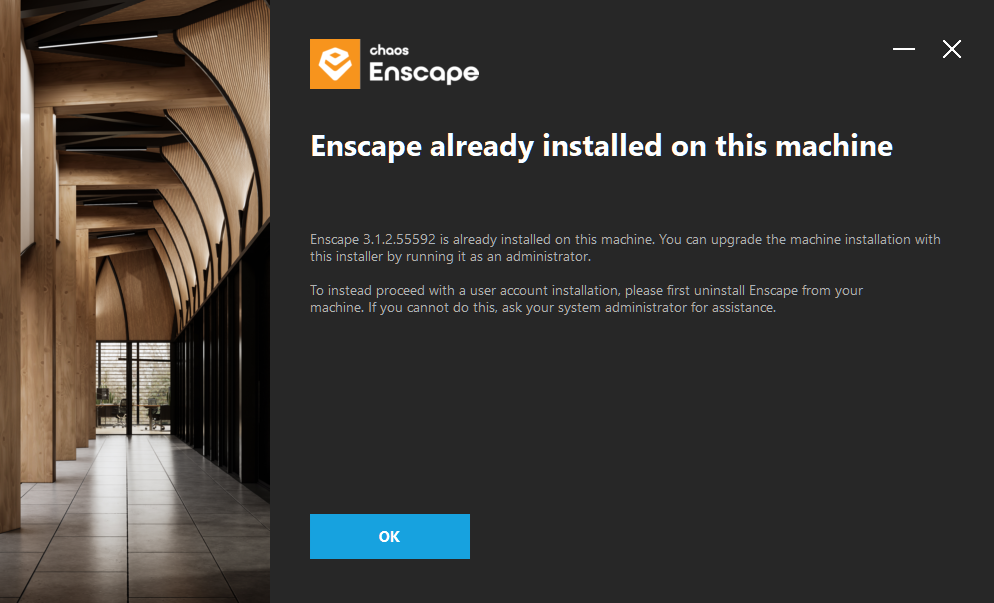
If you have Enscape installed on your computer already but do not have the add-ins showing up in your BIM apps (Revit, SketchUp, etc), then you need to re-run the installer as an administrator.
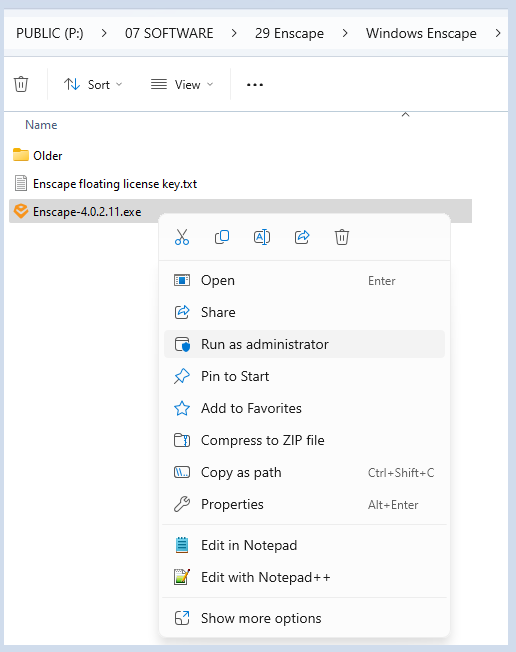
Navigate to P:\07 SOFTWARE\29 Enscape\Windows Enscape
Right-click on the .exe file and then select run as administrator.
Simple Installation
After clicking on the ‘Install‘ button once the language has been selected, and there are no missing requirements, then the Requirements dialog is skipped and the installer will proceed to install Enscape and all its subfeatures, but only for the currently logged in user. You will therefore find that it installs to the default location:
C:\Users\%username%\AppData\Local\Programs
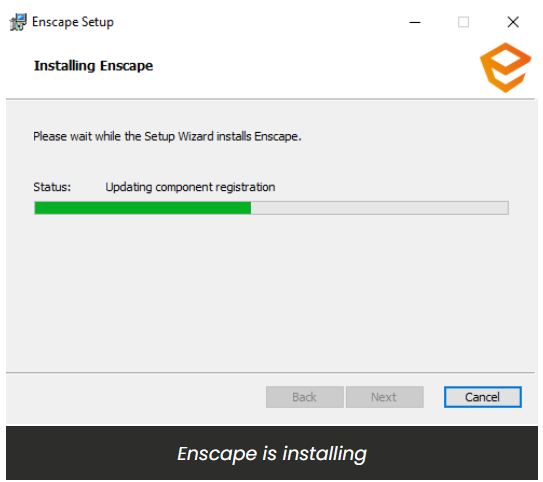
The installer will then run and you should see this in the installer window as shown in the following screenshot.
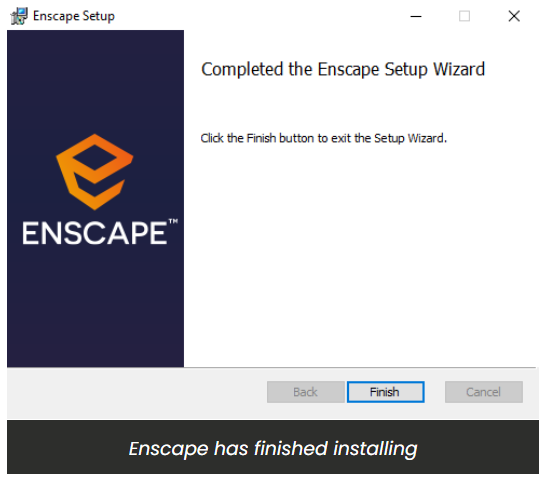
Once it has finished, you will then see the following screen indicating Enscape has finished installing.
You should then be able to open your CAD where you should see Enscape as a top level menu option, or as a Toolbar. If you can not see Enscape in your CAD, then you may need to enable it in the CAD’s workspace.
To understand how to do that, please click here.
Missing Requirements
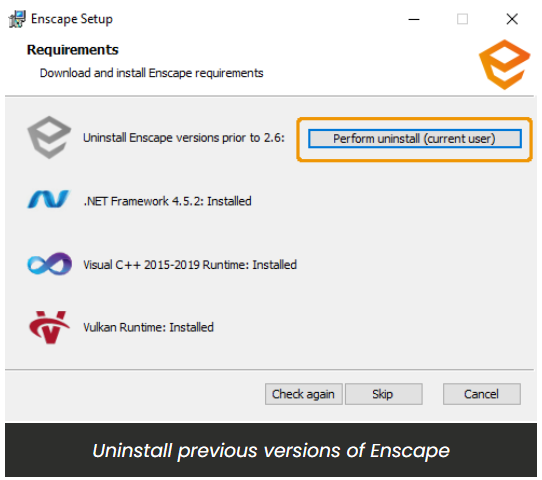
If you have an Enscape version prior to 2.6 installed, or if you are missing any software that Enscape requires to function correctly, then the next screen you’ll see is the Requirements screen.
You can click the Skip button, even if the machine is missing any of these requirements or if you decide not to remove any previous versions of Enscape. However, it is advised that you click on the Perform uninstall button and that you also make sure that you install any missing requirements that are listed in this window, as Enscape will not function correctly otherwise.
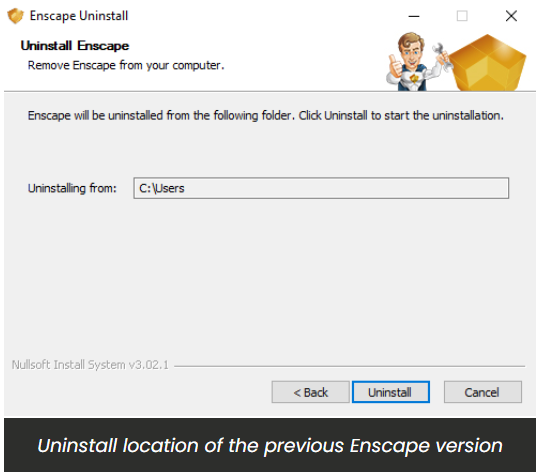
The installer for versions prior to version 2.6 will open (you can confirm this as it will show the old Enscape logo in the installer dialog) and it will indicate the target uninstaller location next to Uninstalling from:. Click on the Uninstall button to uninstall the previous Enscape version.
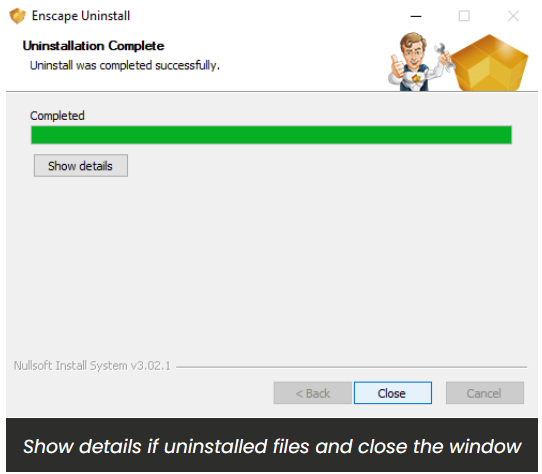
You will then see the following window, indicating the uninstall process is running and when it will have completed.
By clicking on Show details after the process has run, you will be able to see which files were uninstalled.
Or, just click on the Close button to close that old installer dialog.
You will be returned to the Requirements page of the current installer dialog which should indicate that the process was completed. If you want to be sure of this, or if the installer indicates that a previous version still exists, then you can click on the Check again button.

If one of the other requirements is missing, this will be indicated next to the missing requirement whereby a prompt will request that you Download that missing element.
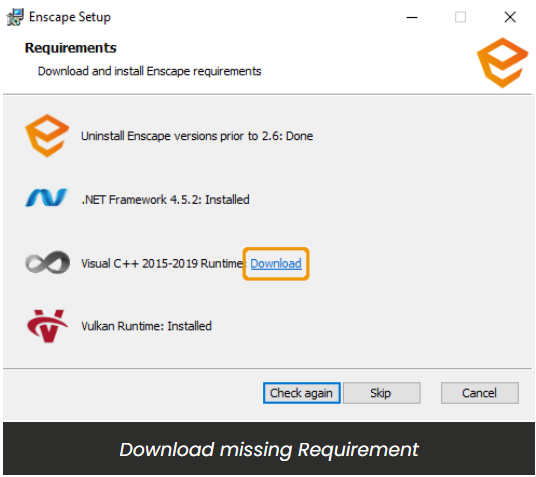
Once you click on ‘Download‘ the missing software will automatically download and the installer for that software will then be required to be manually started and opened after download is complete. By default the downloaded installer will be available in your systems Download folder, or directly from your browser. The installer for each software required to run Enscape will guide you through the installation process for its installation. Once installation has been completed, click the Check again button back in the Enscape installer dialog which should allow you to continue the installation process.
If all previous versions of Enscape have been successfully uninstalled and all software requirements have also been installed on the machine you will then be able to click on the Next button to proceed with installing Enscape.