This is a short guide to help you add the current office printers
Adding the Canon MFP Printer/Scanner/Copiers (East & West)
- The Setup.exe file is located at:
P:\07 SOFTWARE\02 Printer Drivers\Windows\Cannon Copiers (x64) - Run the setup file.
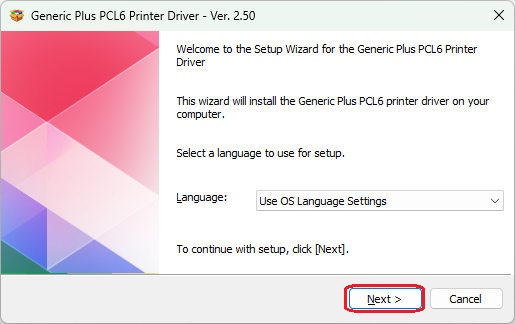
- Click Next
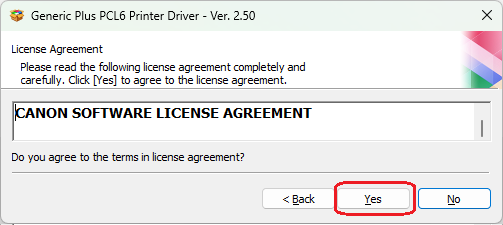
- Click Yes to accept the license agreement
- Leave the default as Standard and click Next
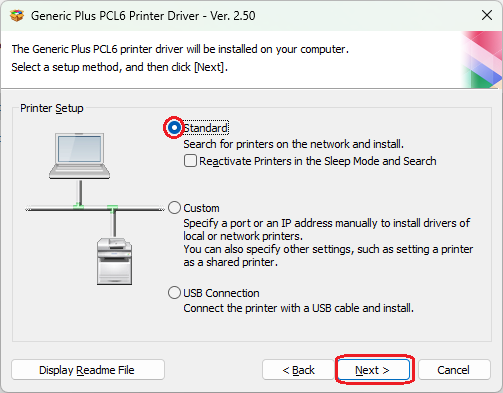
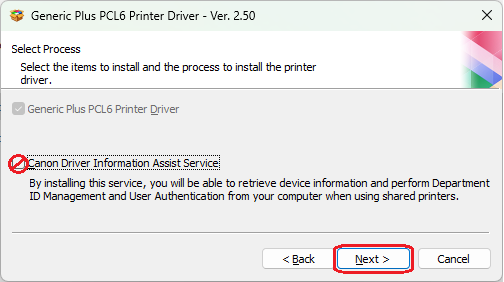
- Do not check Canon driver information assistance; click Next
- The Generic Plus PCL6 Printer Driver will search for printers.
- Checkmark both printers
- iR-ADV C5735 (East)
- iR-ADV C5750-P2 (West)
- Click Next
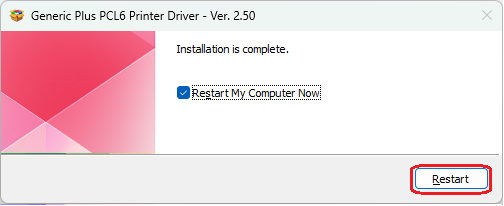
- The installation will complete and require a computer restart.
Optional – Rename the printer
These are instructions on how to rename the printer to something memorable.
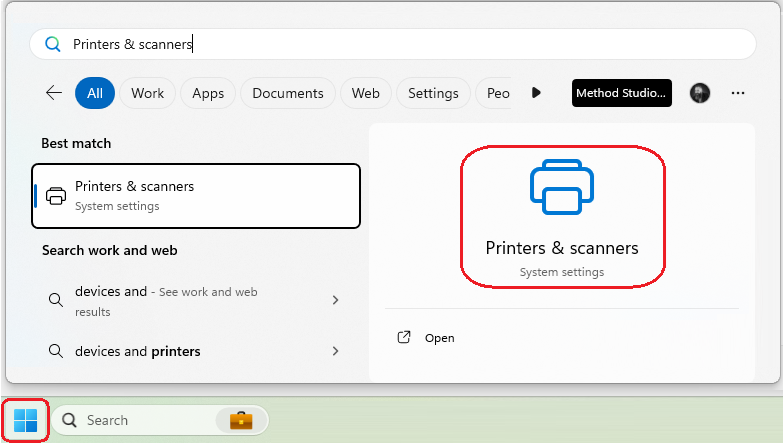
- Click Start
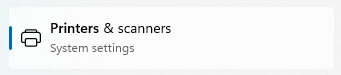
- Type Printers & Scanners and launch it.
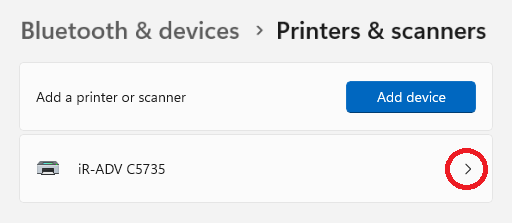
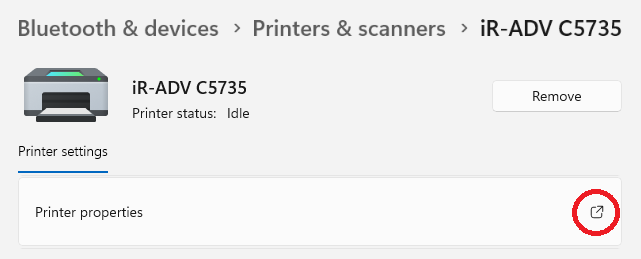
- Scroll down to the printer you wish to change e.g. iR+ADV C5735
- Click on the printer
- Click on Printer properties
- Change the name in the top field to what you want it to display
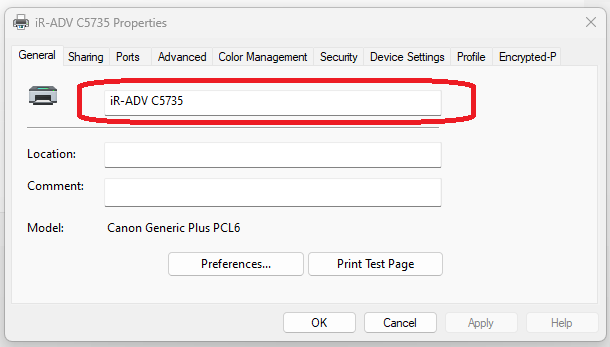
Example:

- Press OK

Adding the HP DesignJet XL 3600
This guide will help you add the HP DesignJet XL 3600 Plotter to your workstation.
- Click Start (Windows icon)
- Type Printers
- Click on Printers & scanners (or it may say Printers and Devices)
- Click Add device (or add printer not listed)
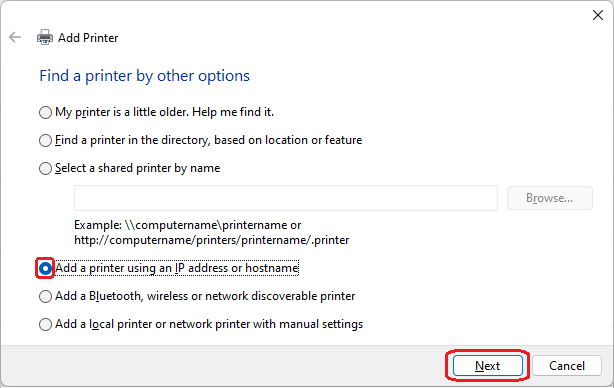
- Click Add manually
- Click Add printer using an IP address or hostname
- Click Next
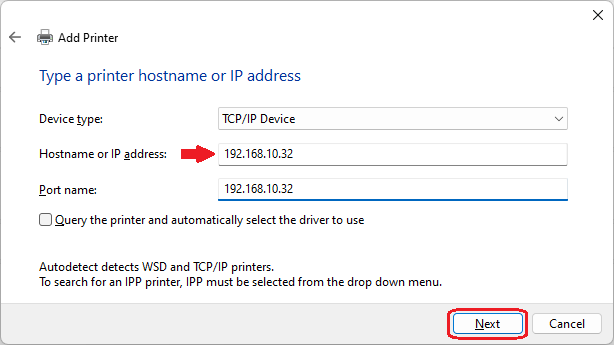
- Change the Device type to TCP/IP
- Type the IP address for this printer: 192.168.10.32
- Uncheck the ‘Query the printer’
- Click Next
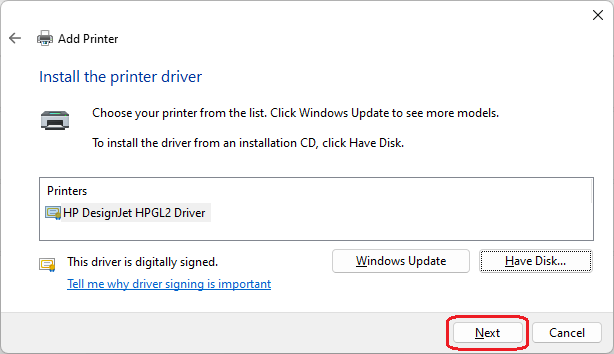
- Click ‘Have Disk’
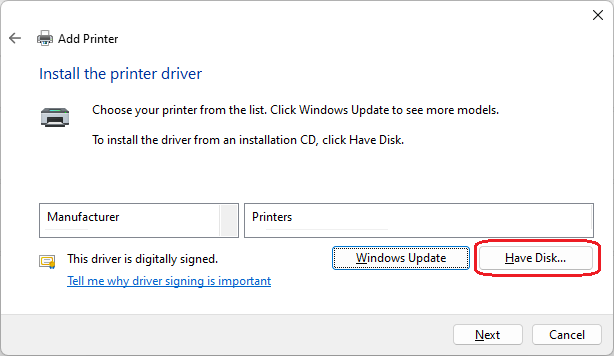
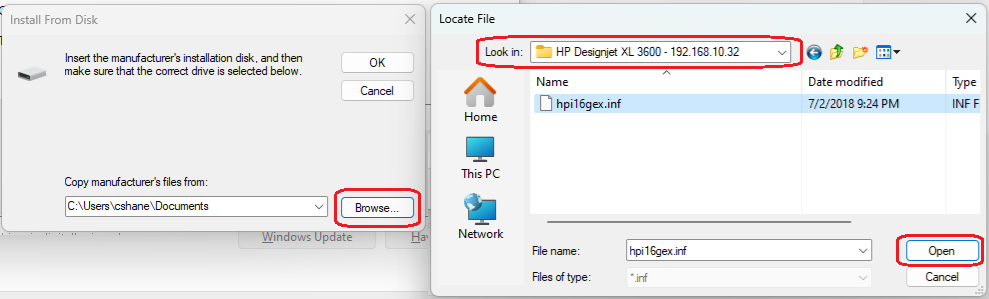
- Click ‘Browse’
- Navigate to the following path to find the driver:
- P:\07 SOFTWARE\02 Printer Drivers\Windows 10\HP Designjet XL 3600
- Select the only option available: “hpi16gex” and click Open/OK
- Click Next
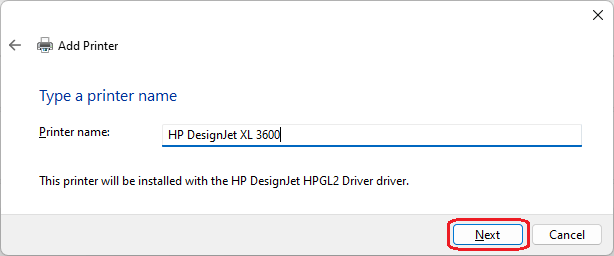
- You can change the printer’s name to HP DesignerJet XL 3600 or just click Next
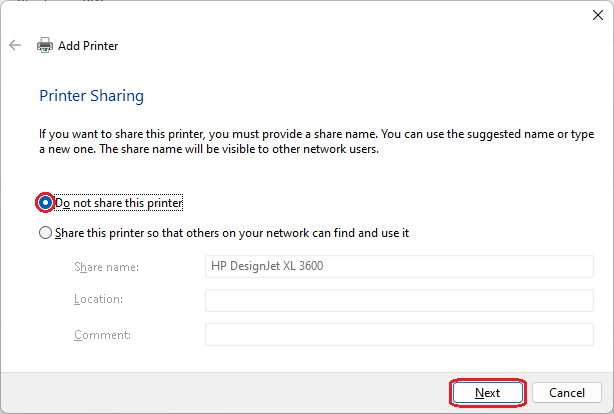
- Click Do not share this printer and click Next
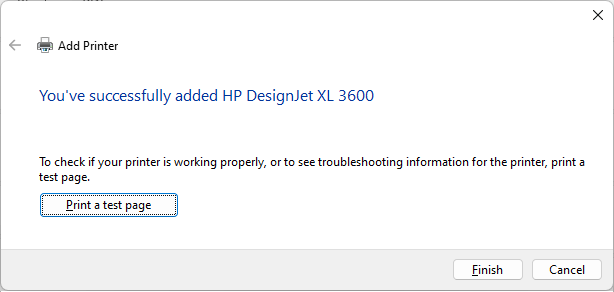
- Click Finish